
Looking to accept payments with WordPress? Whether you’re launching a full-on e-commerce store or just looking to list a few products or services for sale, WordPress has plenty of functionality to help you do just that.
Two of the best options to making that happen are WooCommerce and PayPal Buy Now Button – both are easy to set up and use and they provide two different levels of complexity to suit your unique needs.
📚 In this article, we’ll guide you through the process of configuring both plugins to accept payments with WordPress.
If you just want a lightweight solution suitable for listing a small number of products or services, PayPal Buy Now Button is for you. And if you’d like a more complex and flexible solution, you might prefer going with WooCommerce. Either way, we’re going to show you how! 🎬
Introducing PayPal Buy Now Button
The PayPal Buy Now Button plugin is a straightforward tool to help you accept payments with WordPress. You can use it to insert a button – or several of them – anywhere on your site, and that button will enable users to pay you through PayPal. This plugin is incredibly simple to install, and configuring it shouldn’t take more than a few minutes.
Before we jump into the instructions, you may be interested to know that PayPal does enable you to add payment buttons manually, without the use of a plugin. You don’t need an account to do it either – just follow PayPal’s instructions and you’ll get a code snippet that you can add to a page or post.
If you’re wary about dealing with code, however, PayPal Buy Now Button is a solid alternative that also will save you some time if you need to create a large number of payment buttons. Read on to find out how to use it.
How to use PayPal Buy Now Button to accept online payments
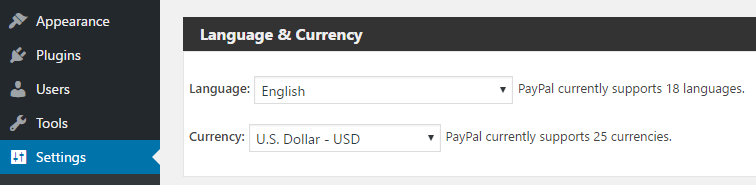
After installing and activating the plugin, you’ll see a new PayPal Button option under Settings on your dashboard. Clicking on this option will send you to the plugin’s main settings screen, where you can pick a language and currency for your button:
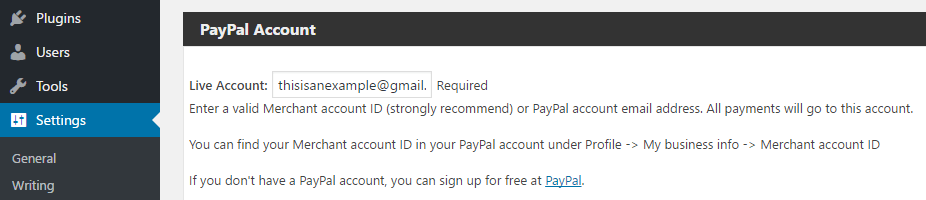
If you scroll a bit further down, you’ll find an option to enter your PayPal Merchant ID (a unique identifier for those of you who have merchant accounts) or a regular email address. You’ll need at least one of these to start receiving payments:
Finally, you can also pick from among several button styles at the bottom of this page, as well as indicate whether PayPal should open in the same window or a new one when a user clicks on the button.
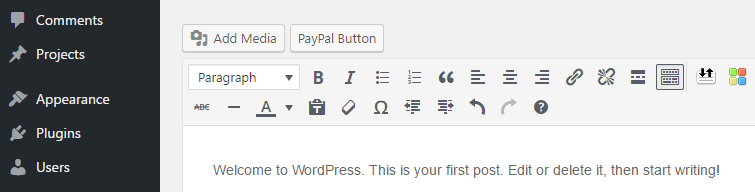
After saving your settings, identify the page or post where you want to include your first PayPal button and open its editor. You’ll find a new PayPal Button option right next to Add Media:
Click on it, and then all you have to do is indicate a name, price, and alignment for your button:
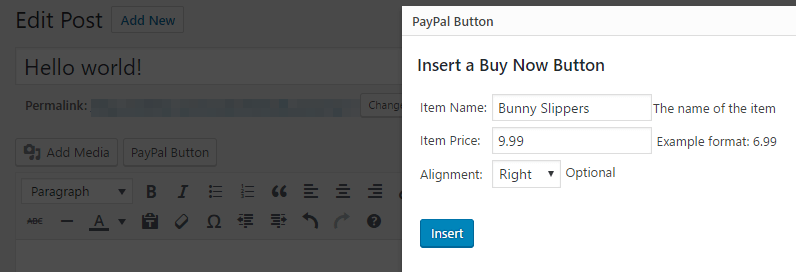
Once you’re done, click on Insert and the plugin will add a shortcode to your page. Your button will now show up on the front end of your site.
Easy as pie, right? 🤩 If you’re looking for a more powerful option, however, read on to discover an excellent alternative you may want to try out.
Introducing WooCommerce

WooCommerce is one of the most popular e-commerce options for WordPress users, and with good reason. This plugin feels like a natural extension of WordPress right out of the box, and it packs all the features you’ll need to create and manage an online store. Plus, there are dozens of handy extensions available that can add extra functionality to your site.
The core difference between this one and the PayPal Buy Now Button plugin is that WooCommerce is a fully-fledged e-commerce store solution – it’s a complete online store. Whereas PayPal Buy Now Button is a simple buy button that only allows you to collect a payment for a specific thing, but is not connected with any online store functionality.
One of WooCommerce’s core features is, of course, accepting payments with WordPress. It enables customers to pay you using either PayPal or Stripe – as long as you turn those settings on – but it also provides you with a way to add more choices. By using extensions, you can add integrate almost every major online payment gateway into your store. So if you’re looking for a plugin that lets you keep your options open, this is it.
Just as before, the first thing you’ll need to do is install and activate the plugin. When you’re done with that, proceed to the next section. 👇
How to use WooCommerce to accept payments with WordPress
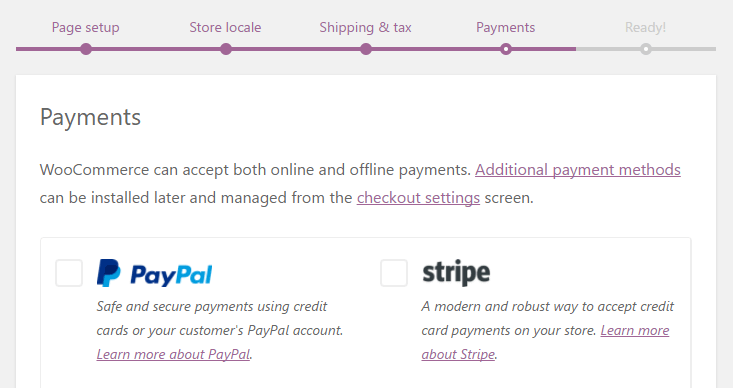
As soon as you activate WooCommerce, you’ll be taken to a setup wizard that will help you configure your online store from scratch. When you get to the fourth step, you’ll be able to choose the payment gateways you want to enable:
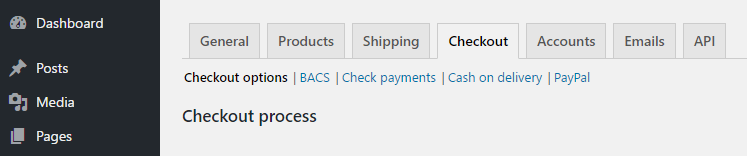
By default, WooCommerce ships with two popular payment gateways: PayPal and Stripe. You can configure each by navigating to WooCommerce → Settings → Checkout on your dashboard, and finding the corresponding option at the top of the screen:
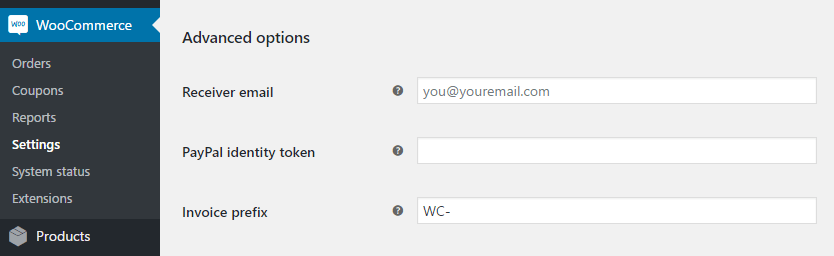
For example, clicking on PayPal will send you to a new page where you can configure where your payments will go, and customize all the other settings you’ll need:
The payment gateways you select will show up when a user tries to check out, so all you have to do is enable and configure each one. Then your store will be ready to go!
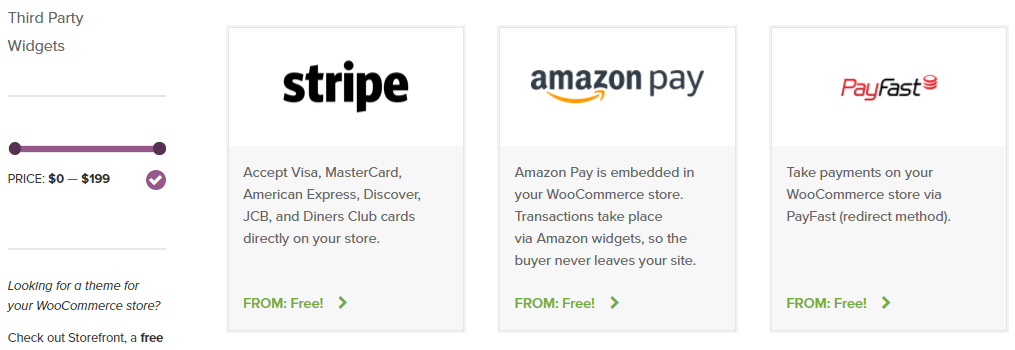
As we mentioned earlier, you can also use WooCommerce extensions to add more payment gateways to your roster. Setting these extensions up works just the same as with other WordPress plugins, and you can find them in the WooCommerce repository:
After enabling the extensions you want, you’ll see new options appear on your WooCommerce Settings page. You can then configure them using the same method we described above. Then, your customers can pick which payment option they want to use on the front end of your site.
Once you set up your payment options, all you need to do is create WooCommerce products for the items that you want to sell. 🏷️
Conclusion 🧐
Figuring out the best way to accept payments with WordPress shouldn’t be an afterthought to setting up your site; it’s a critical step to making sure your website succeeds. After all, customers will quickly become frustrated if they can’t pay with ease, and you won’t be able to focus on growing your site if you don’t get your money promptly.
- 👉 If you’re looking for the easiest way to start accepting payments online, PayPal Buy Now Button may be the right plugin for you.
- 👉 On the other hand, if you’d like to let your customers use more than one payment gateway, WooCommerce provides you with more alternatives (and comes with a lot of other excellent features that will help you set up your store).
Do you have any questions about how to accept payments with WordPress? Fire away in the comments section below!


WordPress – WooCommerce here when it comes to the payment gateway I would suggest to test also g2a pay (the author does not mention about this company) especially that without obligations you can test for a month
Thanks for this article. These are the exact two options I’ve been looking in to, so this was very helpful for me. We’re just getting started selling products online, so we’re looking for a simple and easy solution.
Thank you for nice article on payments with WordPress. I am launching a site selling service and want to offer PayPal and Stripe payment options. I will require one time payment and subscription basis as well. Apart from WooCommerce which plugin or solution would best suite me.
Another method I consider an ‘easy option’: embedding Shopify’s Buy Button in your WordPress site.
Or start the conversation in our Facebook group for WordPress professionals. Find answers, share tips, and get help from other WordPress experts. Join now (it’s free)!