
Whether they’re helping with navigation or driving conversions, links play a crucial role on most modern websites. However, you may feel like your theme’s default URLs are falling short, which is why you might want to change the link color in WordPress.
Fortunately, it is possible to change the link color in WordPress, using your choice of editor options, plugins, or custom code. By applying your own custom color(s), you can make your links stand out from the background – or blend seamlessly with the rest of your design.
In this post, we’ll cover five different ways to change the link color in WordPress. Regardless of whether you’re using a page builder plugin or the WordPress Customizer, you should find a technique that works for you.
Easiest ways to change link color in WordPress
If you want to learn how to change the colors of your links in WordPress, read this tutorial. Here are the methods we’ll be covering next:
- Custom CSS code – if you feel comfortable adding some basic CSS code, this is often the most flexible and widely applicable method.
- WordPress Customizer – there’s a good chance your theme might offer dedicated options to change the link color.
- Elementor – the Elementor page builder makes it easy to change link color sitewide.
- Beaver Builder – the Beaver Builder page builder plugin and theme also include options to change link color.
- WordPress editor (individual links) – if you only want to change the color of specific links, you can do it manually via the WordPress editor.
1. Add CSS code
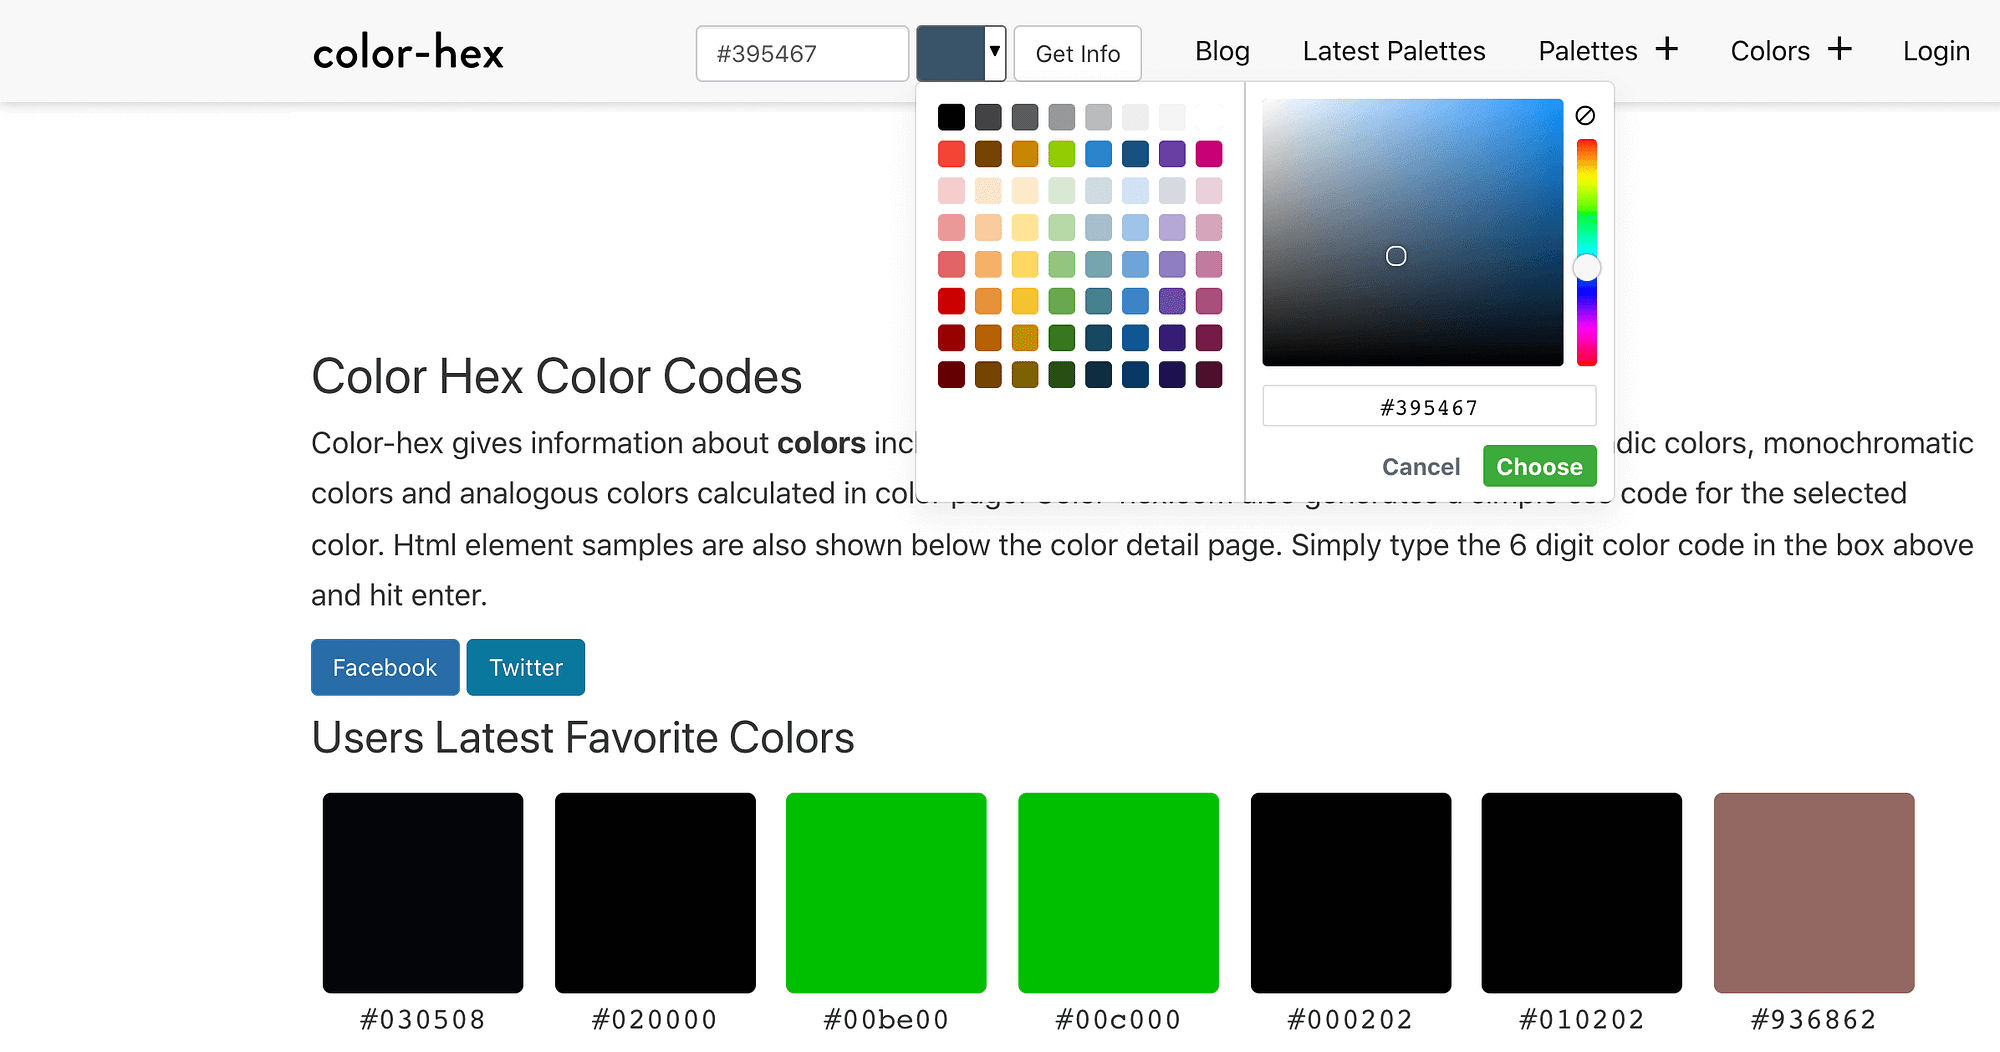
One way to change the link color in WordPress is to write some custom CSS code. This requires you to enter the hex code for the color that you want to use on your website. You can explore the various codes using a service such as color-hex:
Once you’ve found your perfect hex code, log into your WordPress dashboard. Then navigate to Appearance > Customize:

In the left-hand menu, select Additional CSS. You can now enter the following CSS:
a {
     color: #0000FF;
}
Make sure to replace the color: value with the hex code you identified previously. To make your changes live, click on Publish:

The color of all the links across your site should now change. If you’re not happy with this new look, you can always enter a different hex code into the WordPress Customizer:

At some point, you may change your mind and decide to restore your theme’s default link color. To achieve this, simply delete all of the code in the Customizer’s Additional CSS section, and then click on Publish.
2. Check the WordPress Customizer
Depending on your chosen theme, you may be able to modify your links in the WordPress Customizer. This means you won’t have to write any CSS.
In your WordPress dashboard, navigate to Appearance > Customize and search for any options labeled Color. These settings can vary between themes.
For example, if you’re using our own Hestia WordPress theme, select Appearance Settings > Colors. You can then customize your links using the Accent Color settings:
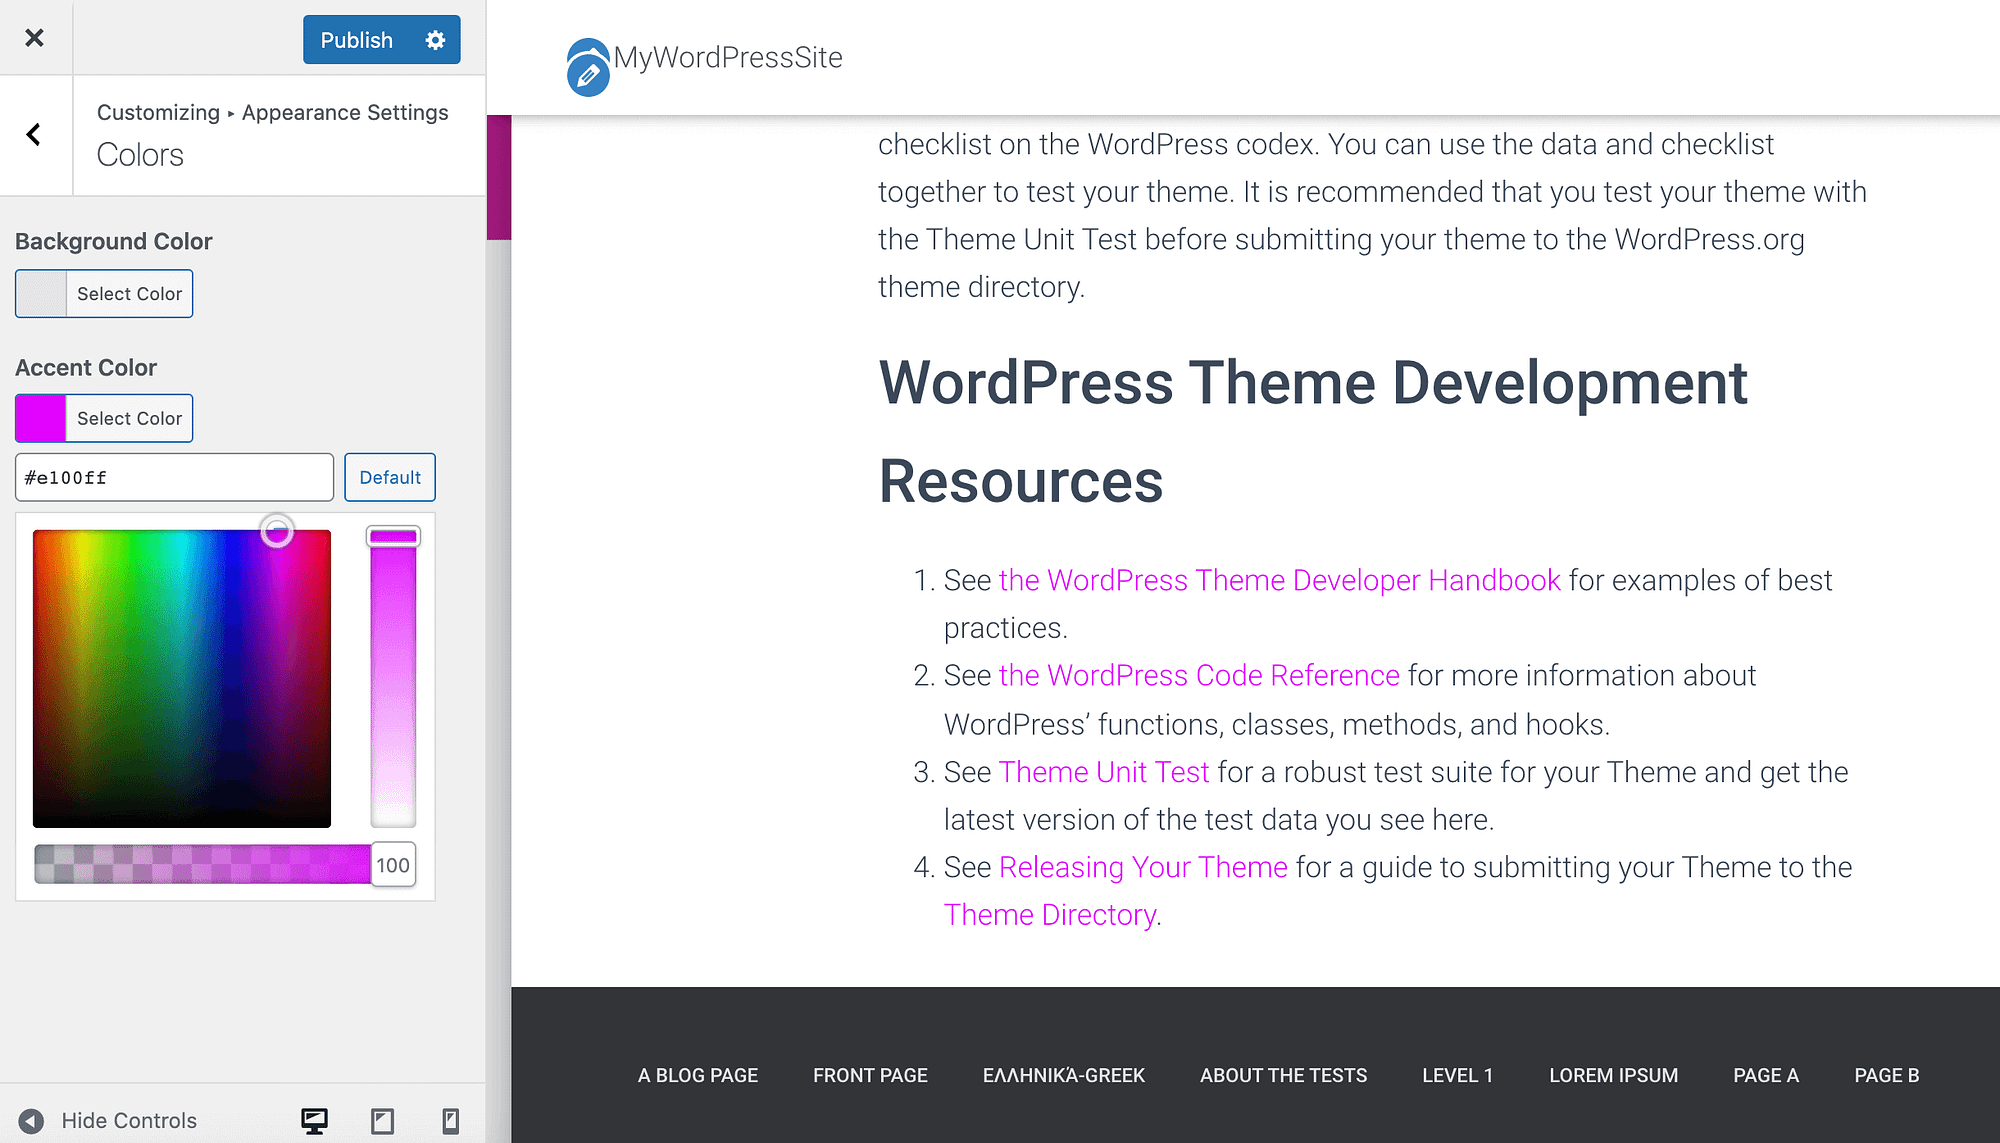
Alternatively, if you have a specific hex code in mind, you can type this value into the accompanying text field. When you’re happy with your selection, click on Publish.
After experimenting with various colors, you may decide that you prefer the defaults. If this is the case, you can restore Hestia’s original accent color by clicking on the Default button.
Our Neve theme also makes it easy to customize your links directly in the WordPress Customizer. In the left-hand menu, select Colors & Background:

Then choose Primary Action. You can now make your selection from the color picker:

To make your changes live, click on Publish.
If you have a change of heart, you can restore Neve’s defaults by scrolling to the bottom of the Colors & Background menu. Then select Reset all to default.
3. Use the Elementor page builder
With over five million active installs, Elementor is one of the most popular WordPress page builder plugins. If you’re using Elementor on your website, you can change the link color by opening any page or post in the Elementor editor:

In the upper-left corner, select the Hamburger icon. Then click on Site Settings:

Next, select Typography. In the subsequent menu, you can change the link’s color when it’s in its default, non-selected state. To make this change, ensure that the Normal tab is selected:
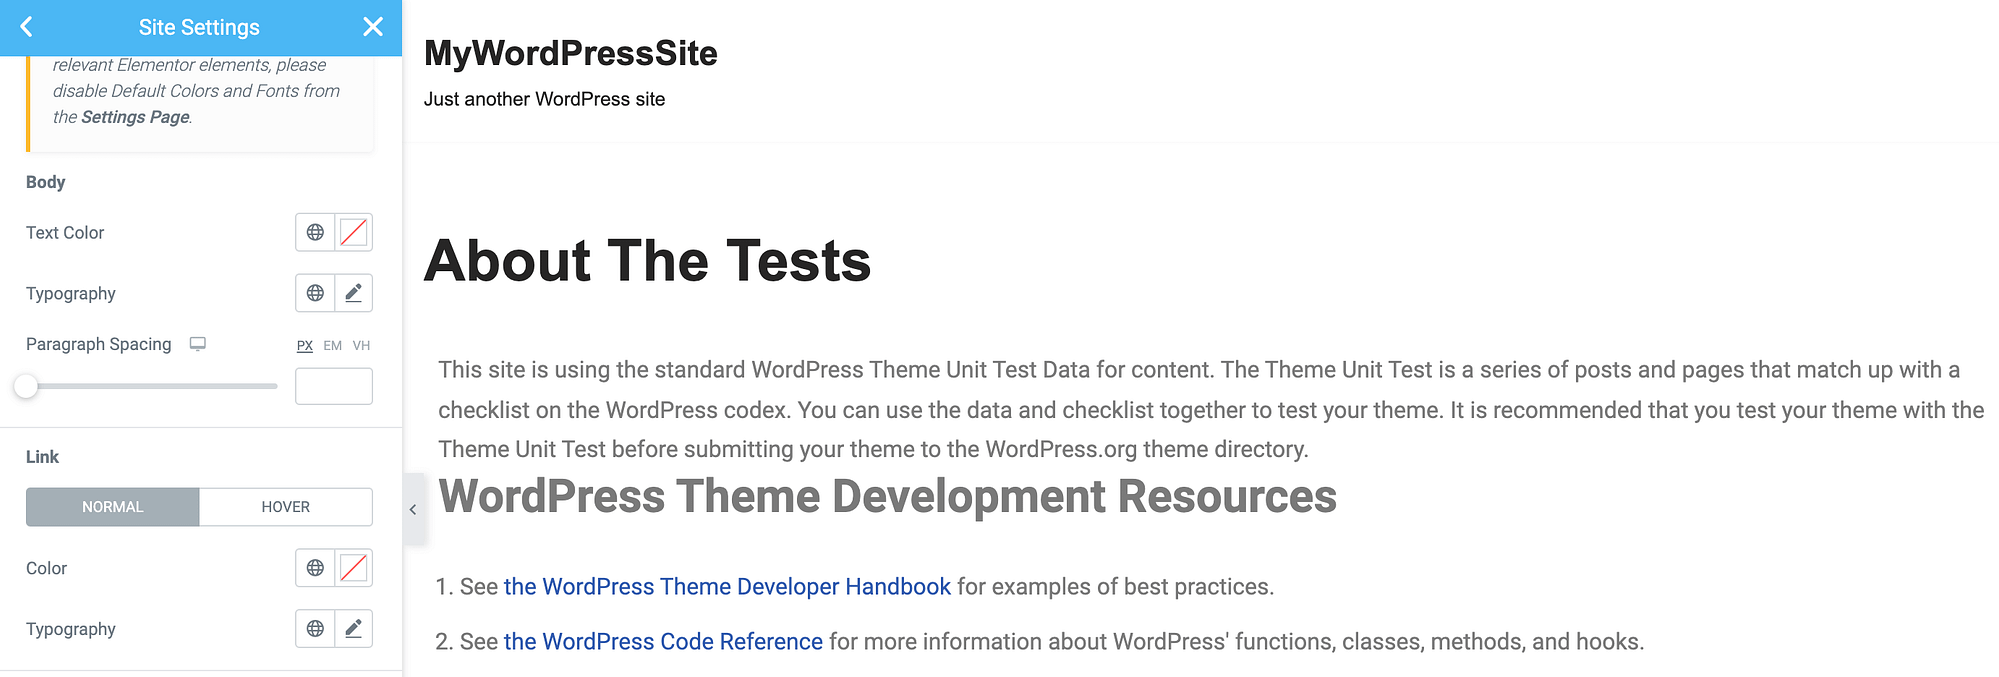
Next, click on either of the icons that accompany the Color settings. Left-to-right, these icons launch a list of your theme’s globally-defined colors, or the WordPress color picker:

While you’re customizing your links, you may also want to change various typography attributes. This includes the style, letter spacing, and line height. You can make these changes using the Typography popup:

Elementor also gives you the option to define a different hover color. This can confirm that the visitor is successfully positioned over a specific link, which can be particularly useful for pages that feature multiple URLs. It may also boost your site’s accessibility for those who have vision-related impairments:

To make this change, select the Hover tab in Elementor’s left-hand menu. You can then use the familiar Color and Typography popups to create a unique hover effect.
When you’ve finished customizing your URLs, don’t forget to click on the Update button. Elementor will now apply these changes to every link across all of your Elementor designs and templates.
4. Use the Beaver Builder plugin and theme
Beaver Builder is an intuitive drag-and-drop builder that’s used by almost four hundred thousand websites. If you’re using this popular plugin plus the Beaver Builder Theme, then you have access to a series of presets. To change the link color in WordPress, you’ll need to override those presets.
In your WordPress dashboard, navigate to Appearance > Themes. Then hover over the Beaver Builder Theme and select Customize. This launches the Beaver Builder editor:

In the left-hand menu, navigate to General > Accent Color. You can now click on Accent Color and use the subsequent picker to choose a new color:
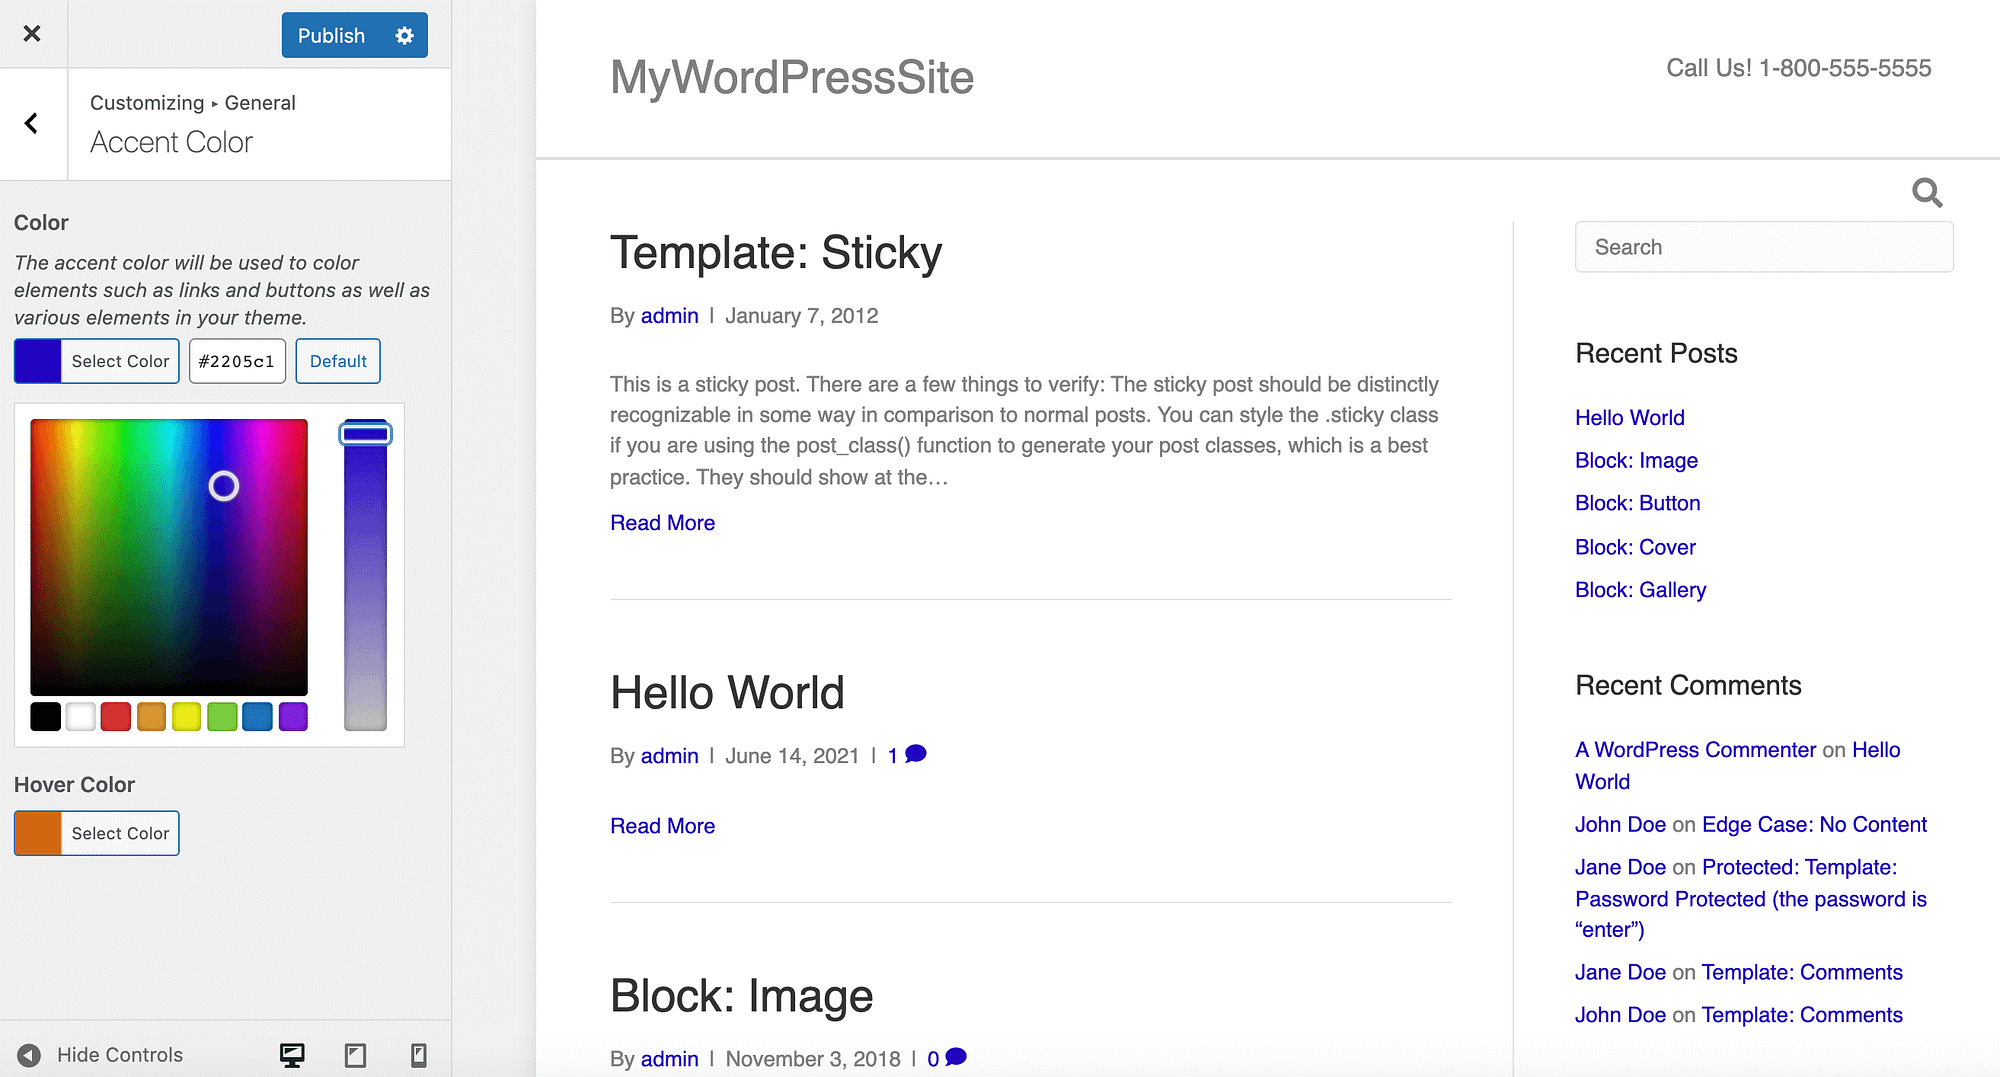
If you have a specific hex code in mind, you can type that value into the accompanying text field. Similar to Elementor, Beaver Builder gives you the option to define a different color when you hover over a link:
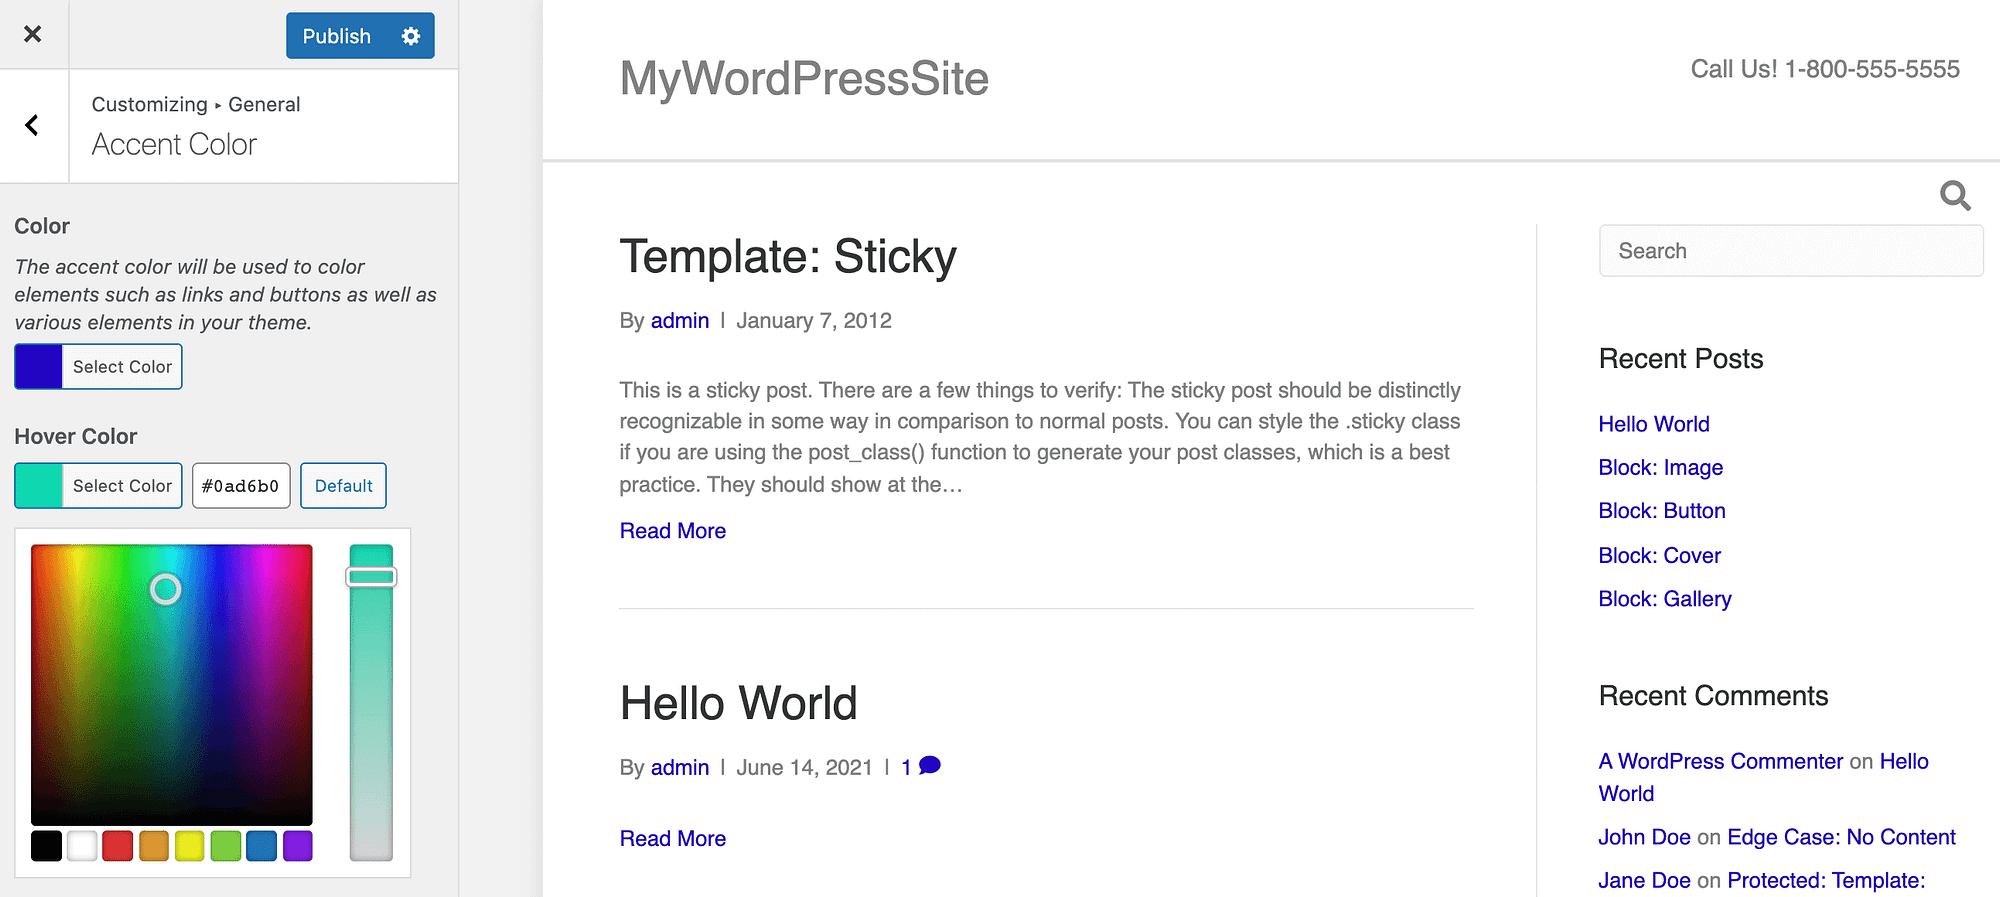
After editing these presets, you can update your site by clicking on Publish. Your links will now have an entirely new look and feel! If you want to restore Beaver Builder’s defaults at any point, simply navigate back to this section and click on the Default button.
5. Change the color of individual links in the WordPress editor
Up until this point, all of the methods we’ve covered have changed the link color across your entire website. A consistent design is often essential for presenting a professional image. It can also help users understand and navigate your website.
However, occasionally you may need to override these site-wide settings. For example, you might want to draw attention to a specific link on a page that features multiple URLs. Alternatively, you may try to catch the visitor’s attention by creating a landing page that contrasts with the rest of your site’s design.
You can change the color of an individual link using the standard WordPress editor. To start, highlight the URL in question. In the floating toolbar that appears, select the downwards-pointing arrow:
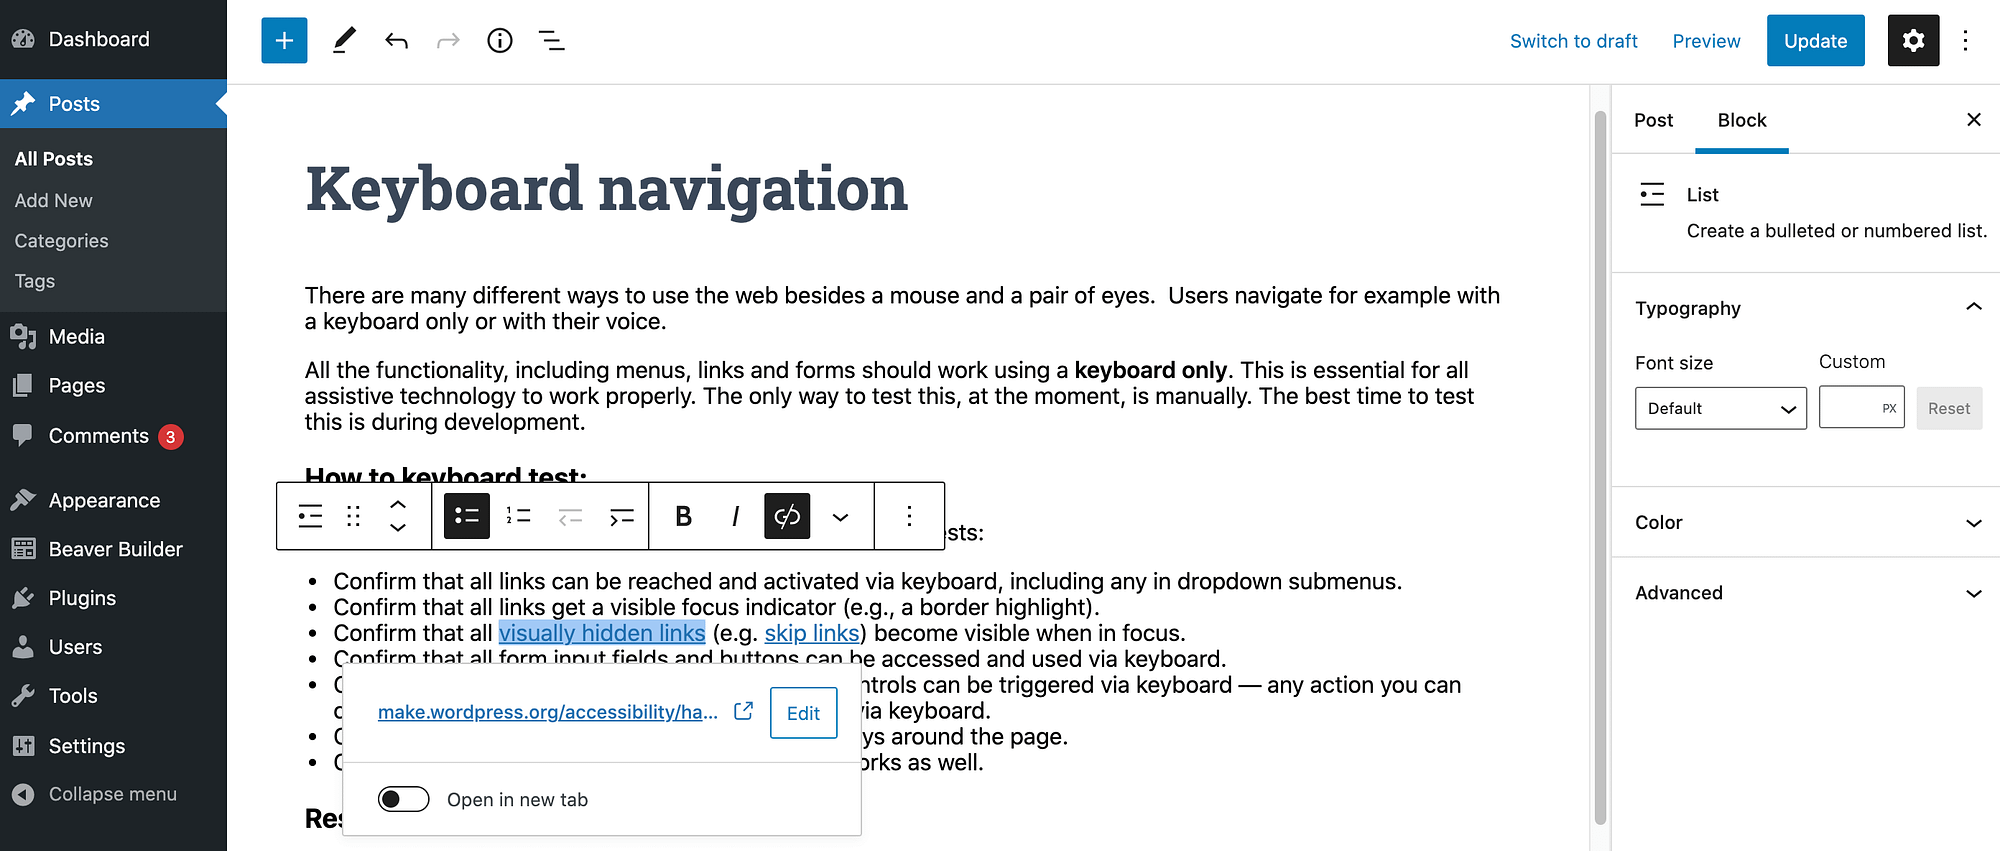
Then choose Text Color. You can now either pick from the predefined colors or select Custom color. The latter launches WordPress’ built-in color picker:

You can repeat these steps to apply a unique color to any other links on this page. When you’re happy with the results, either update or publish the page as normal.
Conclusion on how to change your WordPress link color
When it comes to creating a beautiful, professionally-designed website, the right WordPress theme is crucial. However, every site is unique, and even after finding your perfect theme, you may still need to make some tweaks.
Let’s quickly recap five ways to change the default link color in WordPress:
- Add CSS code.
- Check the WordPress Customizer.
- Use the Elementor page builder.
- Use the Beaver Builder plugin and theme.
- Change the color of individual links.
For some tips on the best colors to use, check out our post on choosing a color scheme for your website.
Do you have any questions about how to customize the WordPress link color? Let’s talk about them in the comments section below!


Or start the conversation in our Facebook group for WordPress professionals. Find answers, share tips, and get help from other WordPress experts. Join now (it’s free)!